Let's cut the fluff. If you are still writing completely separate codebases for iOS and Android in 2026, you are wasting hundreds of hours of your life. Flutter isn't just a fun experiment anymore; it is the absolute industry standard for cross-platform apps. You write your code once in Dart, and it compiles directly into blazingly fast native machine code. No clunky web views. No sluggish UI.
But here is the reality check: most beginners completely screw up the initial setup. They install the wrong SDKs, mess up their PATH variables, and rage-quit before they even write a single line of code.
Stop guessing. I am going to show you the exact, foolproof way to build a Flutter project from absolute scratch. No theory. Just the raw, step-by-step terminal commands you need to get your app compiling on Android, iOS, web, and desktop simultaneously.
Close your other tabs and pay attention. Let's build this.
Quick tip: Stop paying for expensive app builders. Flutter is completely free, backed heavily by Google, and you can spin up a fully functioning app prototype by tonight if you just follow these exact steps.
What Is Flutter and Why Use It?
Forget native Java or Swift. Flutter is a heavy-duty UI toolkit built by Google. It paints every single pixel on the screen using its own rendering engine, which is why it feels ridiculously smooth.
Here is why smart developers refuse to use anything else:
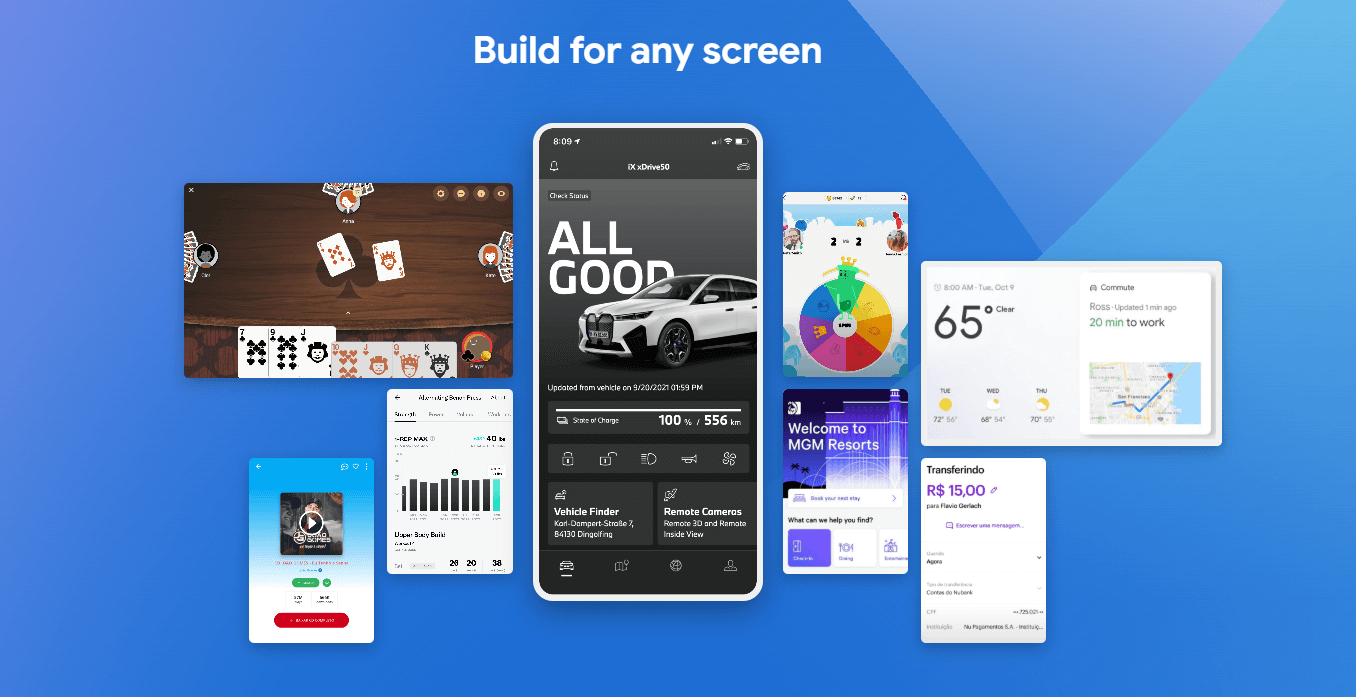
- Cross-platform dominance: You write the code once. You deploy it to the App Store, Google Play, Windows, Mac, Linux, and the web. You maintain one codebase.
- Pixel-perfect control: You aren't fighting native UI constraints. You stack custom widgets exactly how you want them.
- Hot Reload: This will change your life. You hit save, and your app updates on your phone in milliseconds. No more waiting two minutes for Xcode to compile.
- Massive community: If you get stuck, there is a third-party package or a Stack Overflow thread already waiting for you.
- Google's backing: This isn't a dead-end framework. Google actively relies on it.
Further reading: Don't believe me? Read the brutal specs straight from the official Flutter documentation.
Prerequisites for Creating a Flutter Project
Do not even try to run a terminal command yet if your machine isn't prepped. Here is the mandatory gear list:
- Operating System: Windows, macOS, or Linux. (Note: You absolutely cannot compile iOS apps on a Windows machine. Apple forbids it. You need a Mac for iOS).
- Flutter SDK: Download the raw zip from flutter.dev.
- Dart SDK: It comes bundled inside Flutter. Don't download it separately and confuse your system.
- IDE: Stop using Notepad. Download Visual Studio Code (VS Code) or Android Studio.
- Testing Hardware: An actual phone plugged into your USB port, or a heavy Android Emulator.
- Git: You need this for version control. Don't skip it.
Pro tip: Always run
flutter doctorin your terminal before starting a new project. It acts as a diagnostic scanner and will scream at you if you are missing a crucial Android license.
Step-by-Step: How To Create a Flutter Project
1. Install Flutter SDK
Go to the Flutter installation page. Download the zip file. Extract it to a clean folder (like C:\src\flutter). DO NOT put it in a folder that requires admin privileges like C:\Program Files\. It will break.
Open your system environment variables and add the flutter/bin directory directly to your PATH. If you skip this, your terminal won't recognize the Flutter command.
2. Set Up Your IDE
Install VS Code. It is significantly faster and less bloated than Android Studio. Go to the Extensions marketplace on the left sidebar, search for "Flutter", and hit install. It will automatically grab the Dart extension for you.
3. Verify Your Installation
Open your terminal and type this exact command:
flutter doctorLook at the output. If you see green checkmarks, you are good. If you see red "X" marks complaining about missing Android Toolchains, read the instructions and fix them immediately.
Further reading: Hitting a wall? Read the troubleshooting section in the Flutter installation guide.
4. Create a New Flutter Project
Open your terminal, navigate to your workspace folder, and type:
flutter create my_first_appDo not use capital letters. Do not use spaces. The system will reject it. If you want to look like a professional, set your organization domain right now so your app ID is clean:
flutter create --org com.yourdomain my_first_app5. Open the Project in Your IDE
Drag that newly created my_first_app folder directly into VS Code. The IDE will analyze the files and start downloading the initial packages in the background.
6. Explore the Project Structure
Stop randomly clicking folders. Here is what actually matters:
- lib/: The only folder you actually care about. Your entire app's Dart code lives here.
- lib/main.dart: The engine block. The entry point of your app.
- android/ & ios/: Native wrapper code. Do not touch these files manually unless a specific plugin documentation tells you to.
- test/: Where you write your unit tests.
- pubspec.yaml: The nerve center. This is where you declare your fonts, images, and third-party packages.
Further reading: Need to know exactly what every file does? Read Flutter’s project structure documentation.
7. Run Your App on an Emulator or Device
You can't code blindly. You need a screen.
- Android: Fire up the AVD Manager in Android Studio to launch a fake phone on your screen, or just plug your real Android into the USB port and turn on USB Debugging.
- iOS: Boot up the Xcode Simulator (Mac only).
- Web: Want to run it in a browser? Type
flutter run -d chrome.
Hit the Run button in VS Code, or just type:
flutter runThe first build will take a few minutes because it is compiling Gradle. Be patient. Don't close the terminal.
8. Edit the Main Dart File and Hot Reload
Open lib/main.dart. Find the text that says "Flutter Demo Home Page" and delete it. Type something else. Hit Save (Ctrl+S).
Look at your phone. The text changed instantly without the app restarting. That is Hot Reload. Welcome to modern development.
Further reading: Learn how to weaponize this feature in the Flutter documentation.
9. Add Dependencies and Packages
Don't reinvent the wheel. Need to make an API call? Grab the HTTP package. Open your pubspec.yaml file and carefully paste this under dependencies:
dependencies: flutter: sdk: flutter http: ^1.2.0Save it, and run:
flutter pub getThe package is now injected into your project.
Further reading: Go shop for plugins at pub.dev.
10. Version Control With Git
If you write code without version control, you are asking for a disaster. Open your terminal and run:
git init .gitignoreFlutter already built the .gitignore file for you so you don't accidentally push massive build files to GitHub. Commit your code right now before you break the app.
Understanding Flutter Project Structure
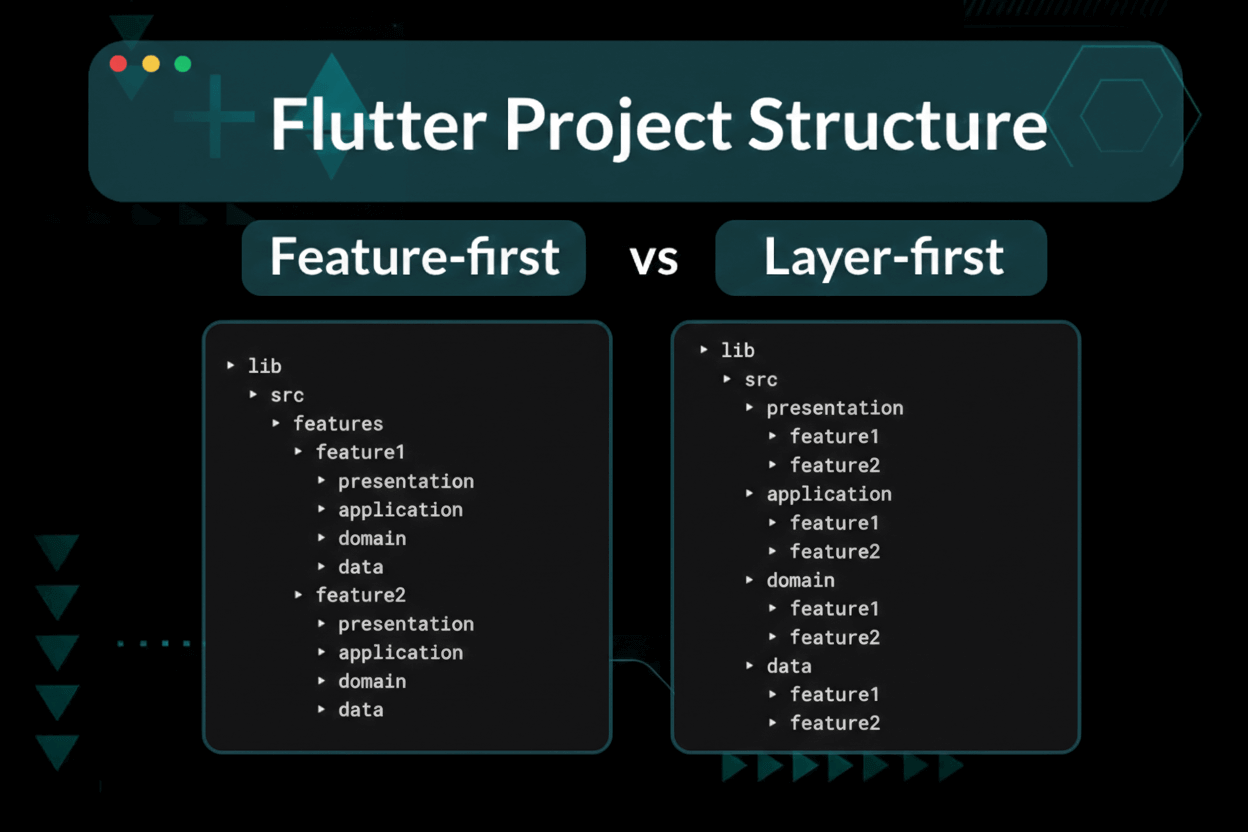
Your files are not a junk drawer. Keep them organized:
- lib/: Build sub-folders in here immediately. Make a
screens/folder, awidgets/folder, and aservices/folder. Keep your logic separated from your UI. - test/: If you are building an app for an actual client, write unit tests here.
- pubspec.yaml: Indentation matters here. If you mess up the spacing by one space, the whole file breaks.
- assets/: You have to create this folder manually to hold your raw images, and then you must explicitly list every single image path inside the pubspec file.
Further reading: Don't write spaghetti code. Read Flutter’s state management and architecture guides.
Customizing Your Flutter Project
Your app currently looks like a default template. Fix it:
- Change the app name and icon: Stop editing XML files manually. Just install the flutter_launcher_icons package and let it automatically generate the icons for both iOS and Android.
- Add assets: Drop your PNGs in the
assets/folder and link them in the pubspec. - Integrate Firebase: Building a real backend? Use the
firebase_corepackage and use the FlutterFire CLI to automatically wire up your databases.
Pro tip: Use flutter_gen. It auto-generates safe code for your images so you don't crash the app with a typo in an image path.
Running and Debugging Your Flutter App
Your code will crash. Here is how you survive:
- Hot reload: Instantly pushes UI tweaks.
- Hot restart: Totally wipes the app's memory and restarts it from scratch. Do this if you changed core logic or variables.
- Flutter DevTools: An incredibly aggressive suite of profiling tools. If your app is dropping frames and lagging, fire this up in your browser to see exactly which widget is eating your CPU.
Further reading: Master the tools at Flutter DevTools.
Best Practices for Flutter Projects
- Stop using setState for everything: It is sloppy. Learn a real state management tool like Riverpod, Provider, or Bloc immediately.
- Break up your files: Do not write a 2,000-line
main.dartfile. Extract your widgets into their own files. - Format your code: Run
dart format .constantly. Keep your bracket indentation clean. - Keep dependencies updated: Run
flutter pub upgradeonce a month so you aren't running deprecated garbage code.
Further reading: See exactly how the pros do it at Flutter’s interactive UI best practices.
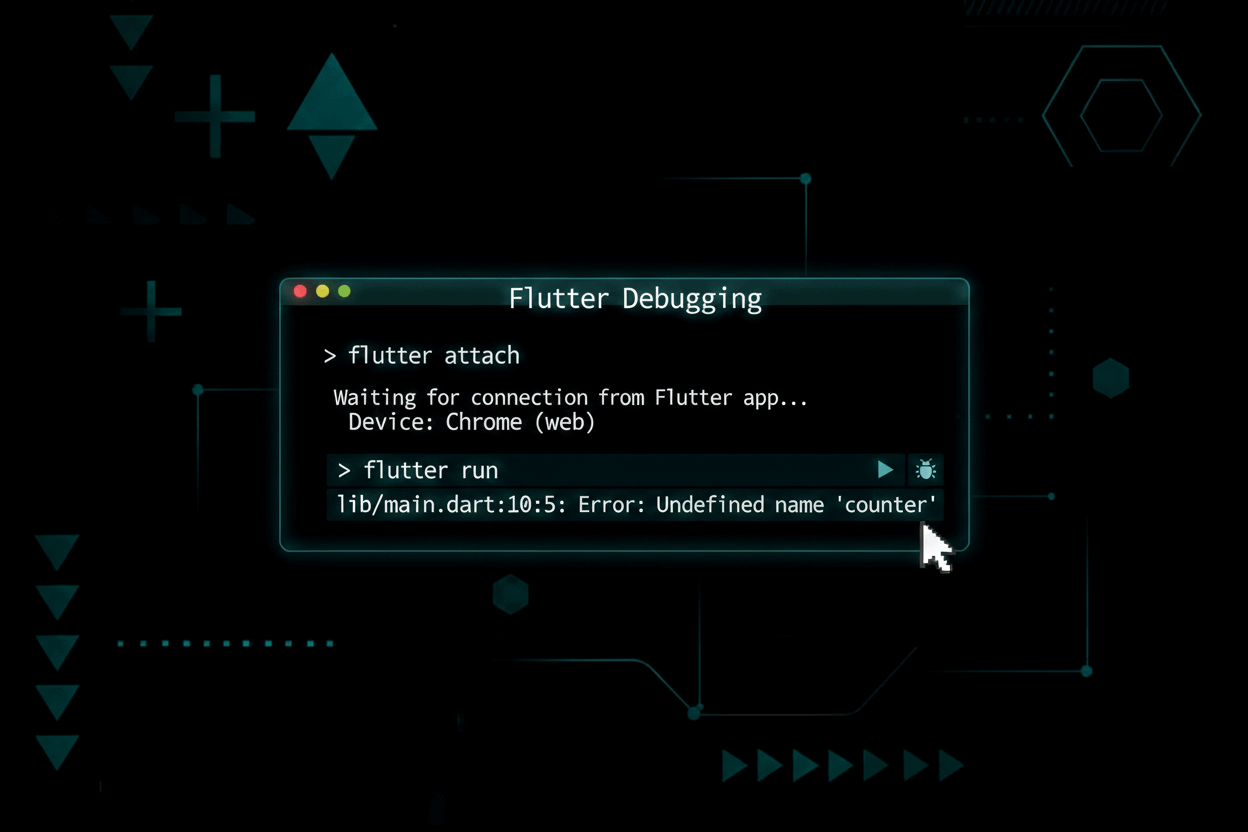
Common Errors and Troubleshooting
You will see red text in your terminal. Do not panic. Read it.
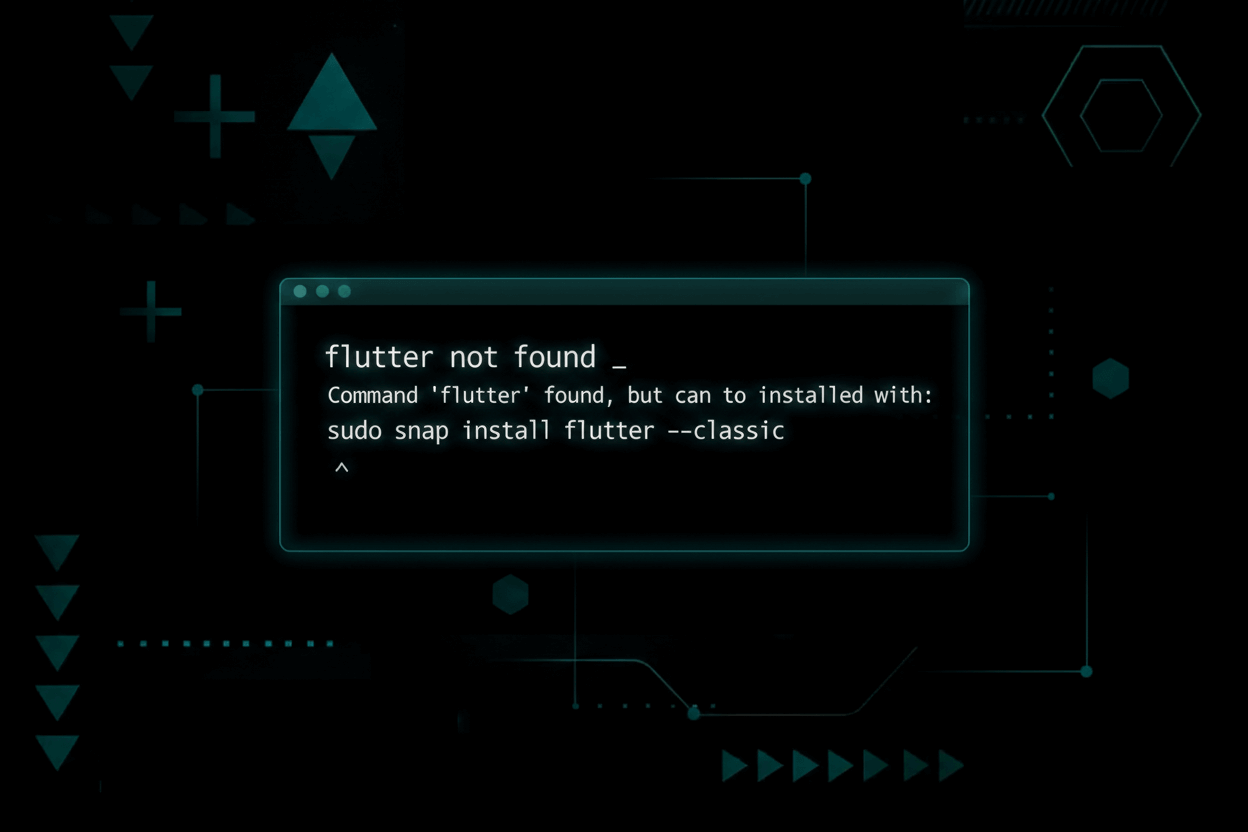
- Flutter command not found: You skipped the PATH variable step. Go back and fix your Windows environment settings.
- Device not detected: You either have a cheap, broken USB cable, or you forgot to turn on Developer Mode / USB Debugging on your Android phone.
- Dependency conflicts: Two packages hate each other. Run
flutter pub outdatedto see which package is dragging you down. - Weird Gradle ghost crashes: Stop tweaking files. Just run
flutter clean, then runflutter pub get. This fixes 90% of random build failures.
Pro tip: If you get a specific error code, paste it exactly into the Stack Overflow search bar. Someone has already solved it.
Learning Resources and Next Steps
Stop paying $100 for outdated courses. Use the official, free documentation:
- Flutter Codelabs: Stop watching videos. Write actual code.
- Dart Language Guides: If you don't understand Dart, you will fail at Flutter.
- Pub.dev: The absolute goldmine for plugins.
- Flutter YouTube Channel: The official Google dev videos.
- Flutter GitHub Repository: Look under the hood.
- Learn Coding For Kids: Start them early.
Want to dominate search traffic while you code? Read our brutal guides on Keyword Research and stop using terrible servers by checking the Best WordPress Hosting Providers.
FAQ: How To Create Flutter Project
What do I actually need to start?
You need the Flutter SDK, VS Code, and a machine. And if you want to compile an iOS app, you absolutely must own a Mac. Windows machines cannot build Apple apps.
How do I run the app on my physical phone?
Plug it in. Turn on USB Debugging. Check your terminal with flutter devices to make sure the computer sees it. Then type flutter run.
Can I really use this for Web and Desktop?
Yes. The engine supports it out of the box now. Just type flutter config --enable-web and run it in Chrome.
How do I install third-party packages?
You never download files manually. You paste the package name into your pubspec.yaml file, save it, and run flutter pub get in the terminal.
Ready to Build Your First Flutter App?
You now have a fully compiled, running application sitting on your phone. The hardest part—the environment setup—is officially over.
Stop reading generic tutorials and start building your UI. The Flutter engine is insanely powerful if you stop fighting the layout constraints and learn how the widget tree actually works. Strip out the default template, hit Hot Reload, and build something people actually want to use.
Get back to the code.