
Think blogging is dead? Think again. Writing a blog is still one of the absolute best ways to get your voice out there, build a personal brand, and yes—actually make money straight from your laptop. But if you've never built a website before, just staring at a blank screen can feel totally paralyzing. Where do you even host it? What on earth do you write about? And how does anyone actually get traffic?
The good news is that launching a blog in 2026 doesn't require a computer science degree. If you follow a clear roadmap, you can have a gorgeous, professional site up and running by dinner time, even if you are a total beginner to the tech world.
This guide is built specifically for newbies. Whether you're looking for a creative outlet, want to boost your freelance portfolio, or dream of turning a blog into a full-time business, I'll walk you through every single step. No confusing tech jargon—just practical advice and the tools you actually need.
Ready to finally get this thing off the ground? Let’s get into it.
Quick Summary: The 8 Steps to Launch Your Blog

For those looking for a quick checklist, here is the exact roadmap we will follow:
Identify your niche: Figure out what you're actually going to write about (and who wants to read it).
Choose a platform: Pick the software that will power your site behind the scenes.
Pick a domain & hosting: Claim your slice of the internet and give your blog a catchy name.
- Set up and install: Get the tech stuff out of the way and configure your basic settings.
Design and customize: Make your site look pretty, clean, and professional.
Create essential pages: Get your About, Contact, and Legal pages squared away.
Publish your first post: Write something people actually care about.
Promote and monetize: Bring in readers and start building real income streams.
Did you know? There are over 600 million blogs sitting on the internet right now, with millions of posts going live every single day. Sounds crowded, right? But with a smart strategy, you can easily carve out your own space and attract a fiercely loyal readership.
Step 1: Choose Your Blog Niche
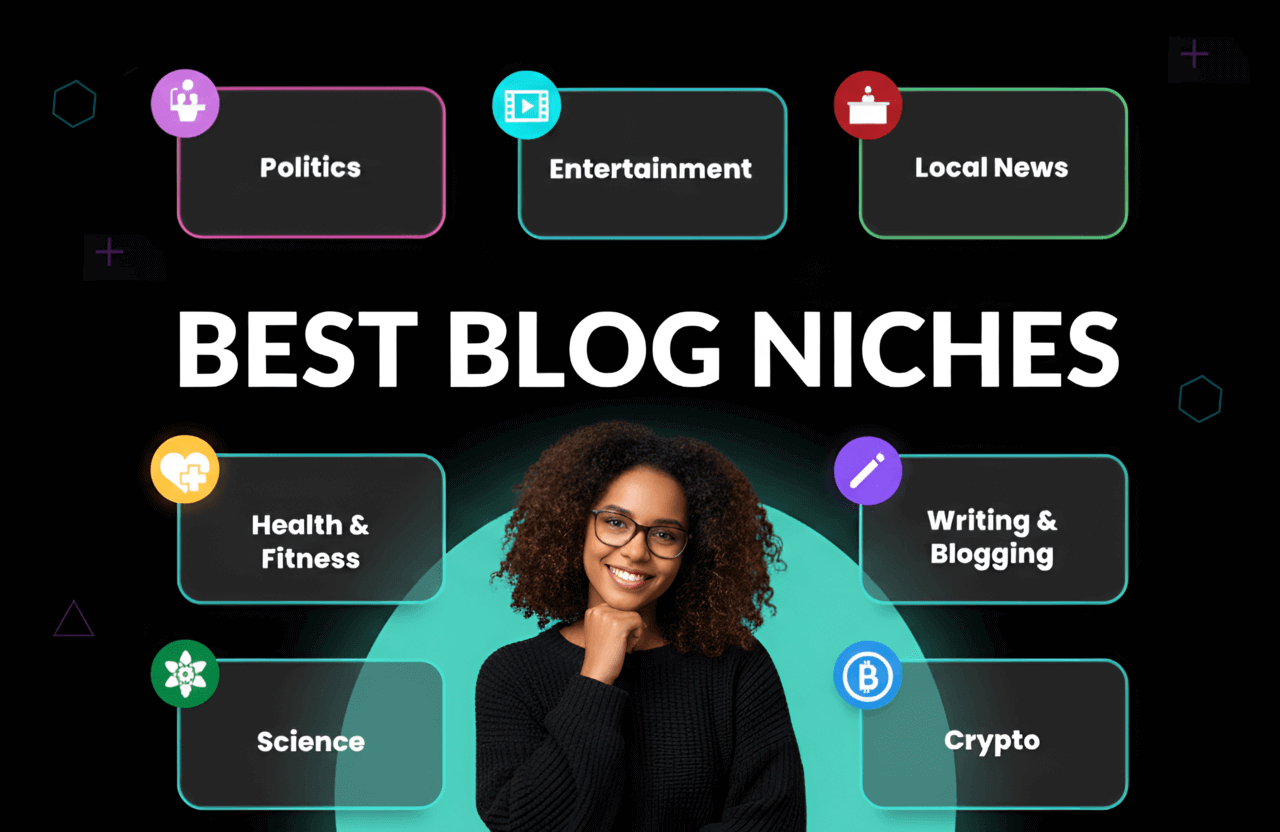
Before typing a single paragraph, you need a game plan. A "niche" is just a fancy word for your blog's main topic. The most successful blogs out there don't talk about everything; they solve very specific problems for a very specific group of people.
Nailing down your niche basically sets the foundation for your whole website. Here is how to figure it out:
- List your interests and expertise: What do you geek out about? What could you chat about for hours at a coffee shop? What are you naturally better at than the average person?
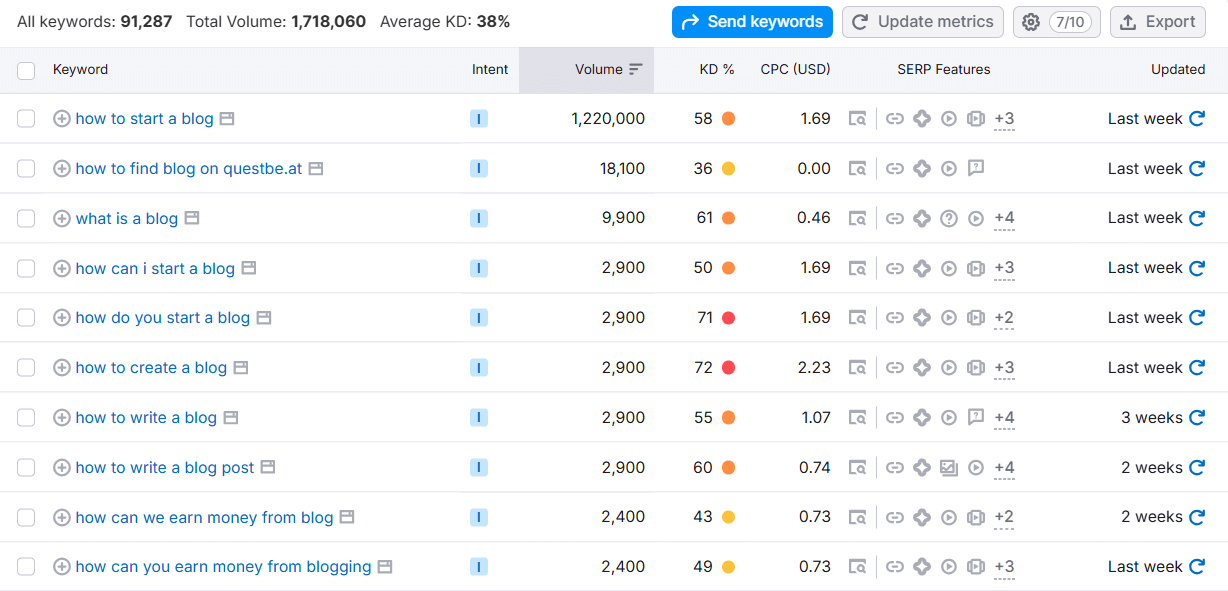
- Research audience demand: You need to make sure people actually care about your topic. Fire up tools like SEMrush or Ahrefs to see if folks are actively searching for it.
- Check the competition: Peek at the other blogs in your space. Is there room for your unique voice?
- Find your unique angle: What makes you different? Maybe you have wild personal stories, serious industry expertise, or a super specific sub-niche no one is talking about.
Popular blog topics usually center around personal finance, fitness, tech tutorials, travel, food, and digital marketing. But seriously, don’t be afraid to go highly specific; those laser-focused topics often attract the most passionate readers.
Why Keyword Research Matters When Starting a Blog
You could design the most breathtaking website ever, but if you're writing about things nobody is Googling, your traffic will sit at zero. That's exactly where SEO (Search Engine Optimization) comes into play.
Before you even draft a post, run your idea through a tool like Ubersuggest, the free version of Ahrefs, or even just the Google search bar to see what people are actually typing.
Look for:
Long-tail keywords: These are super specific phrases with 3 or more words (think "best vegan hiking boots" instead of just "boots").
Low competition: Topics that massive giants like Forbes or Wikipedia haven't completely swallowed up yet.
Specificity Wins
Please, whatever you do, avoid trying to write a generic "Lifestyle" blog. You have to drill down deeper.
Too Broad: Fitness
Better: Home workouts for busy parents
Best: Plant-based meal prep for endurance athletes.
Pro Tip: Don't forget about Google Trends. It's a completely free tool that shows you if interest in your topic is blowing up or dying out over time.
Step 2: Choosing a Blogging Platform
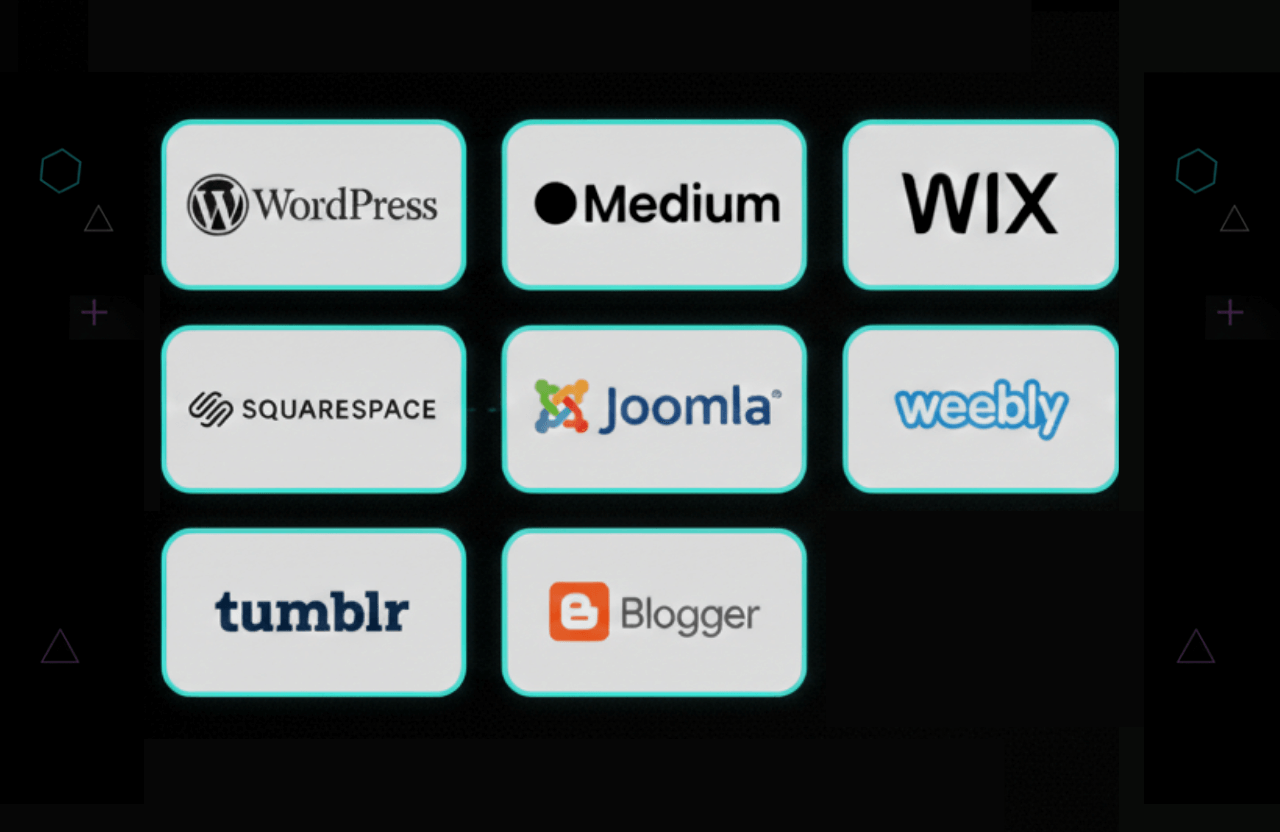
This is exactly where a lot of beginners freeze up. You generally have two paths here: jumping on a hosted platform (think Wix, Squarespace, Blogger, or Medium) or using a self-hosted CMS like WordPress.
Hosted vs. Self-Hosted: A Comparison
| Feature | Hosted (e.g., Wix, Squarespace) | Self-Hosted (WordPress) |
|---|---|---|
Ease of Use | Very Easy (Drag & Drop) | Moderate (Takes a minute to learn) |
Ownership | You rent the land (They can shut you down) | You own the land 100% |
Customization | Limited | Unlimited (Endless Themes & Plugins) |
Monetization | Restricted on cheaper plans | 100% Yours to keep |
Cost | Higher monthly fees | Way lower long-term costs |
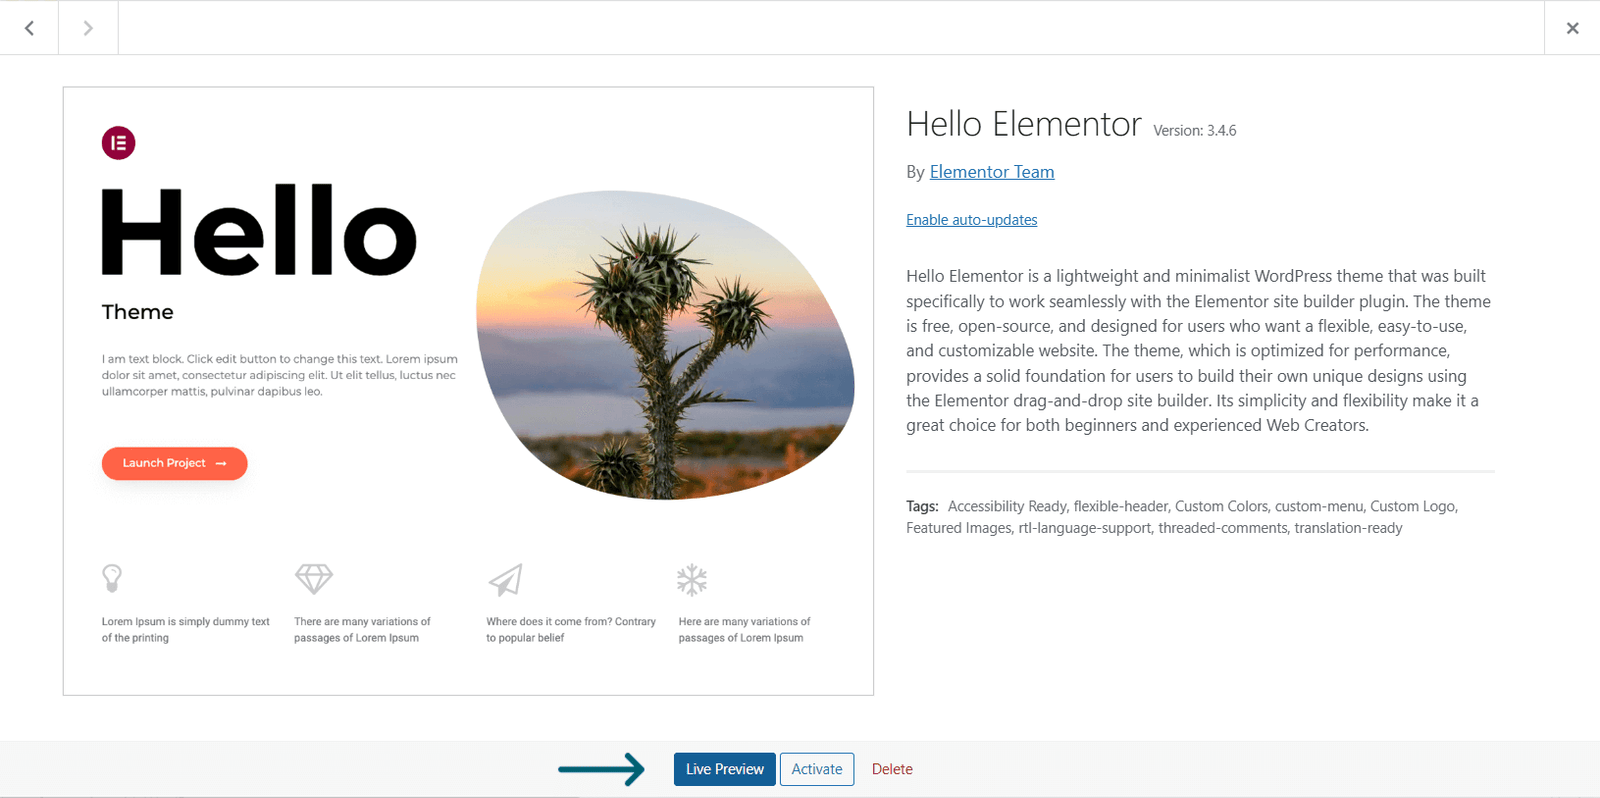
If you're genuinely serious about learning how to start a blog that you completely own and eventually want to monetize, Self-Hosted WordPress is the absolute gold standard. It gives you the most room to grow.
Why Choose Self-Hosted WordPress?
- Beginner-friendly: The dashboard makes sense, and there's a massive community ready to help if you get stuck.
- Customizable: You get access to thousands of free and premium themes and plugins.
- SEO-ready: It has incredible built-in features to help you rank on Google.
- Ownership: Nobody can take your site down. You own it.
Verdict: Just go with WordPress. There's a reason it runs over 43% of the entire internet.
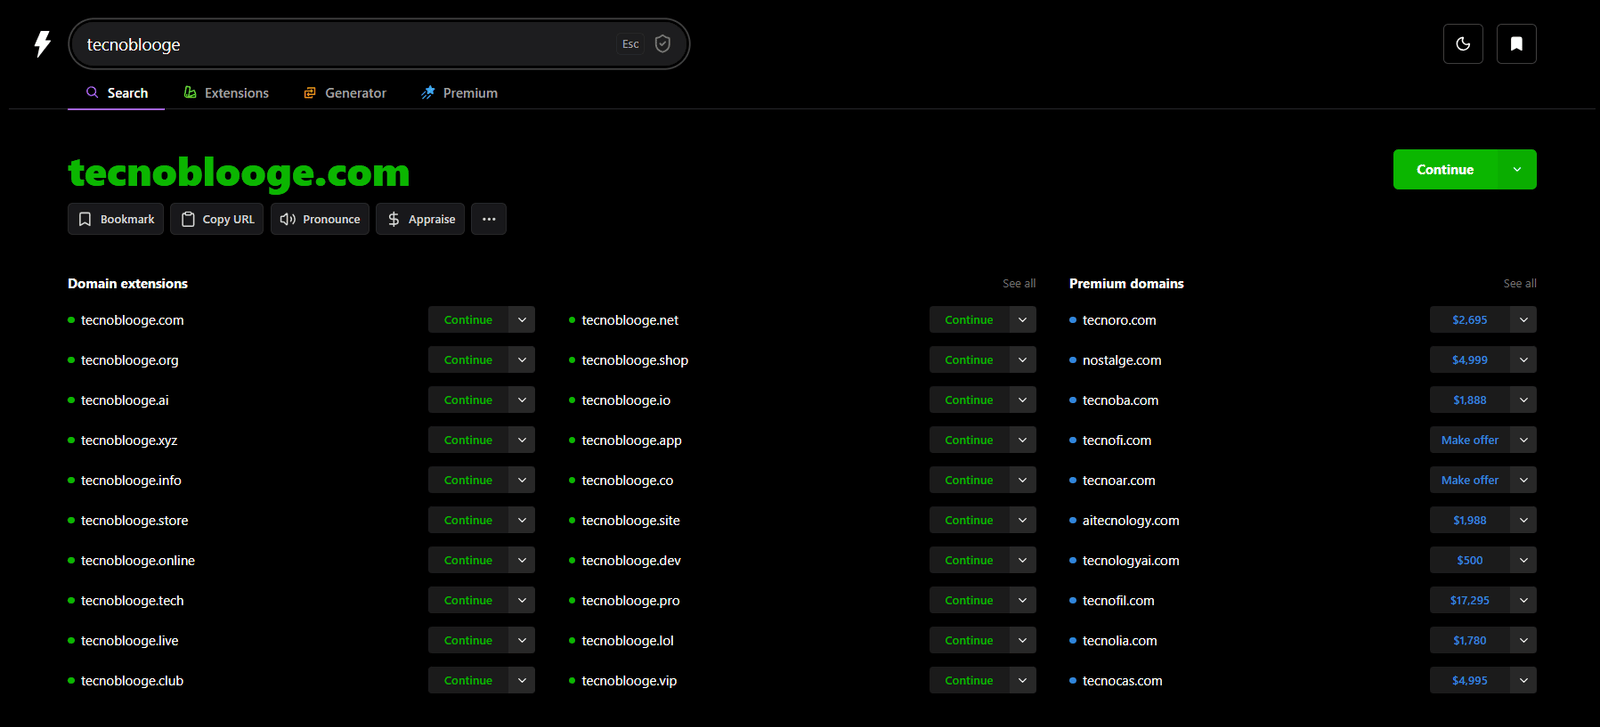
Step 3: Pick a Domain Name and Hosting Provider

Alright, time for the nuts and bolts. To get your site live, you need two pieces of the puzzle:
Domain Name: This is what people type to find you (like
yourblog.com).Web Hosting: This is where your website actually lives. Think of it as renting server space on the internet so people can access your files 24/7.
How to Choose a Domain Name
- Keep it short and memorable: Stick to 2 or 3 words. If people can't spell it, they won't visit.
- Use your niche keywords: This is great for branding and gives Google a hint about your site (e.g.,
vegantraveldiaries.com). - Avoid numbers and hyphens: They just confuse people. Don't use them.
- Check availability: Head over to a registrar like Namecheap or GoDaddy and type in your idea to see if it's taken.
How to Choose a Hosting Provider
For a brand new blog, shared hosting is cheap, easy, and totally sufficient. Keep an eye out for:
- Reliability and uptime: You want a host that guarantees at least 99.9% uptime so your site never goes dark.
- One-click WordPress installation: This saves you from tearing your hair out during setup.
- Good support: 24/7 live chat is a lifesaver when you're just starting out.
- Scalability: Make sure it's easy to upgrade your plan once your traffic spikes.
Step 4: Install Your Blogging Platform
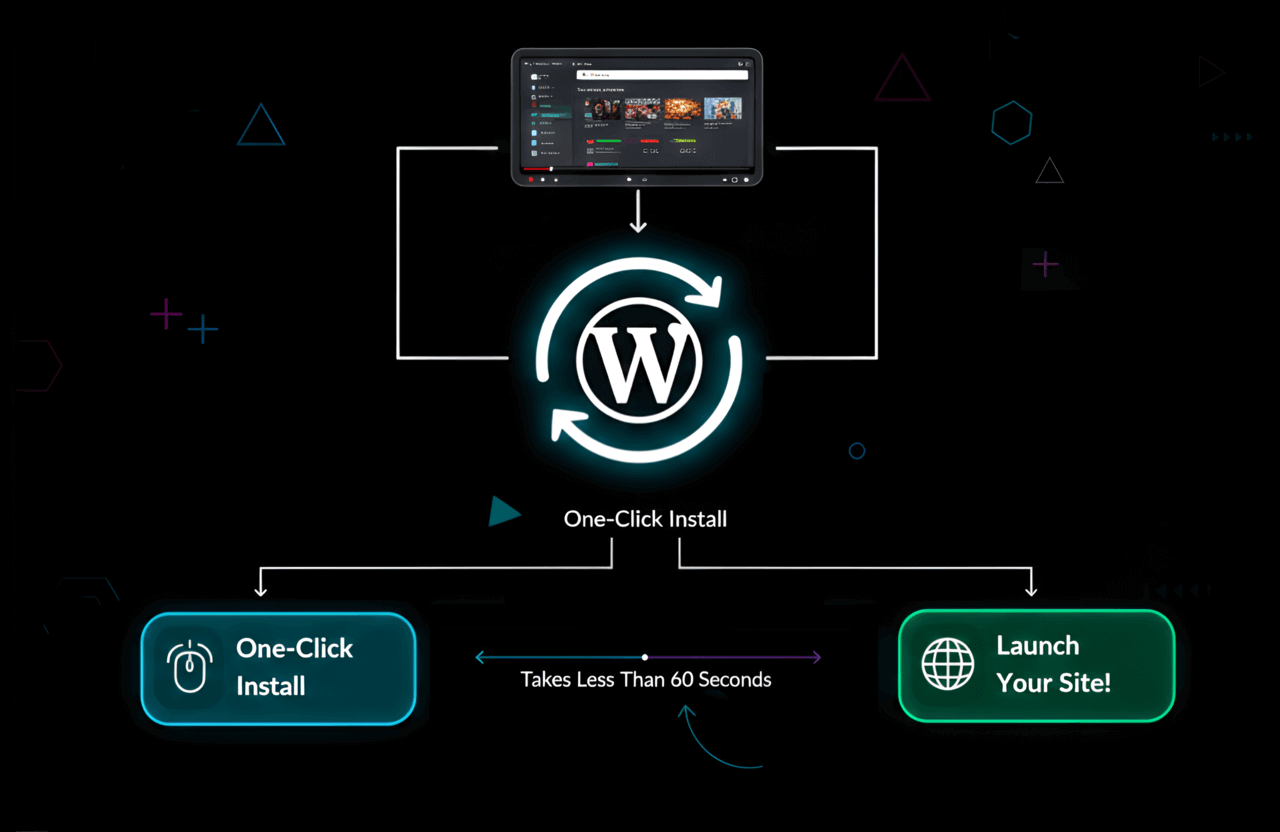
I promise this is way easier than it sounds. Most big hosting companies practically do it for you with "One-Click WordPress Installation."
Visit a Hosting Provider: Pick a basic starter plan. Seriously, you do not need the expensive "Pro" tier on day one.
Register Your Domain: Try your hardest to get a
.comname—it's still the most trusted extension out there.Complete the Purchase: During checkout, you'll probably see a bunch of upsells for things like "SiteLock Security" or extra SEO tools. Skip them to save cash. But do grab "Domain Privacy Protection" if they offer it. It hides your personal home address from public databases.
Once you pay, you'll set up a password, log into your hosting dashboard, and literally just click "Install WordPress." Give it five minutes, and boom—your site is live.
If you're hunting for a solid, beginner-friendly host, check out Bluehost, SiteGround, or Hostinger. You can also read through our breakdown of the best web hosting providers.
Tip: A lot of hosting companies throw in a free domain for your first year when you sign up. Keep an eye out for that perk!
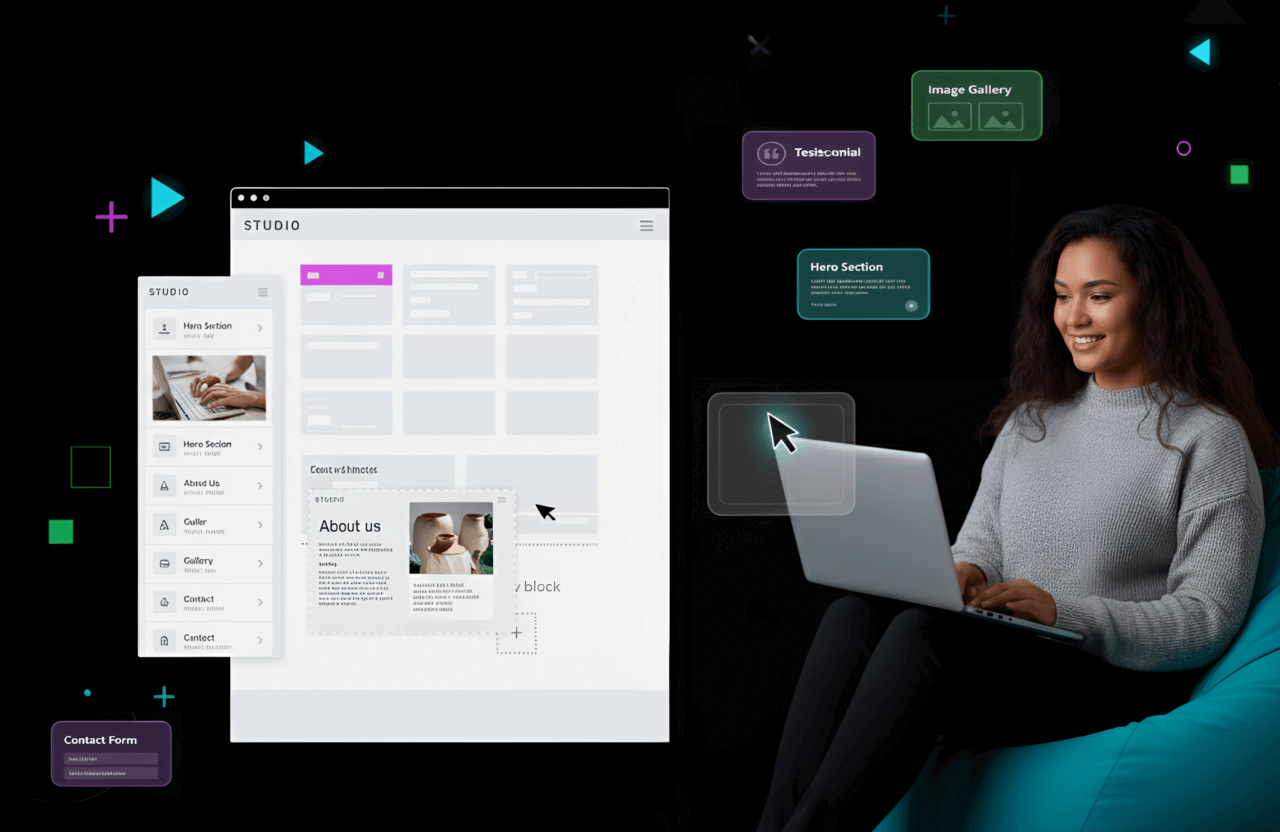
Step 5: Customize and Design Your Blog
When you first log into your WordPress dashboard, your blog is going to look pretty boring. Don't panic.
Your design is the first thing people notice, so it needs to look sharp. Here is how to dress up your new site and make it look professional immediately:
Choosing a Theme
Think of a "Theme" as your website's outfit. It dictates the whole layout.
Free Themes: You can find amazing, lightweight options like Astra, Kadence, and GeneratePress right inside the WordPress directory.
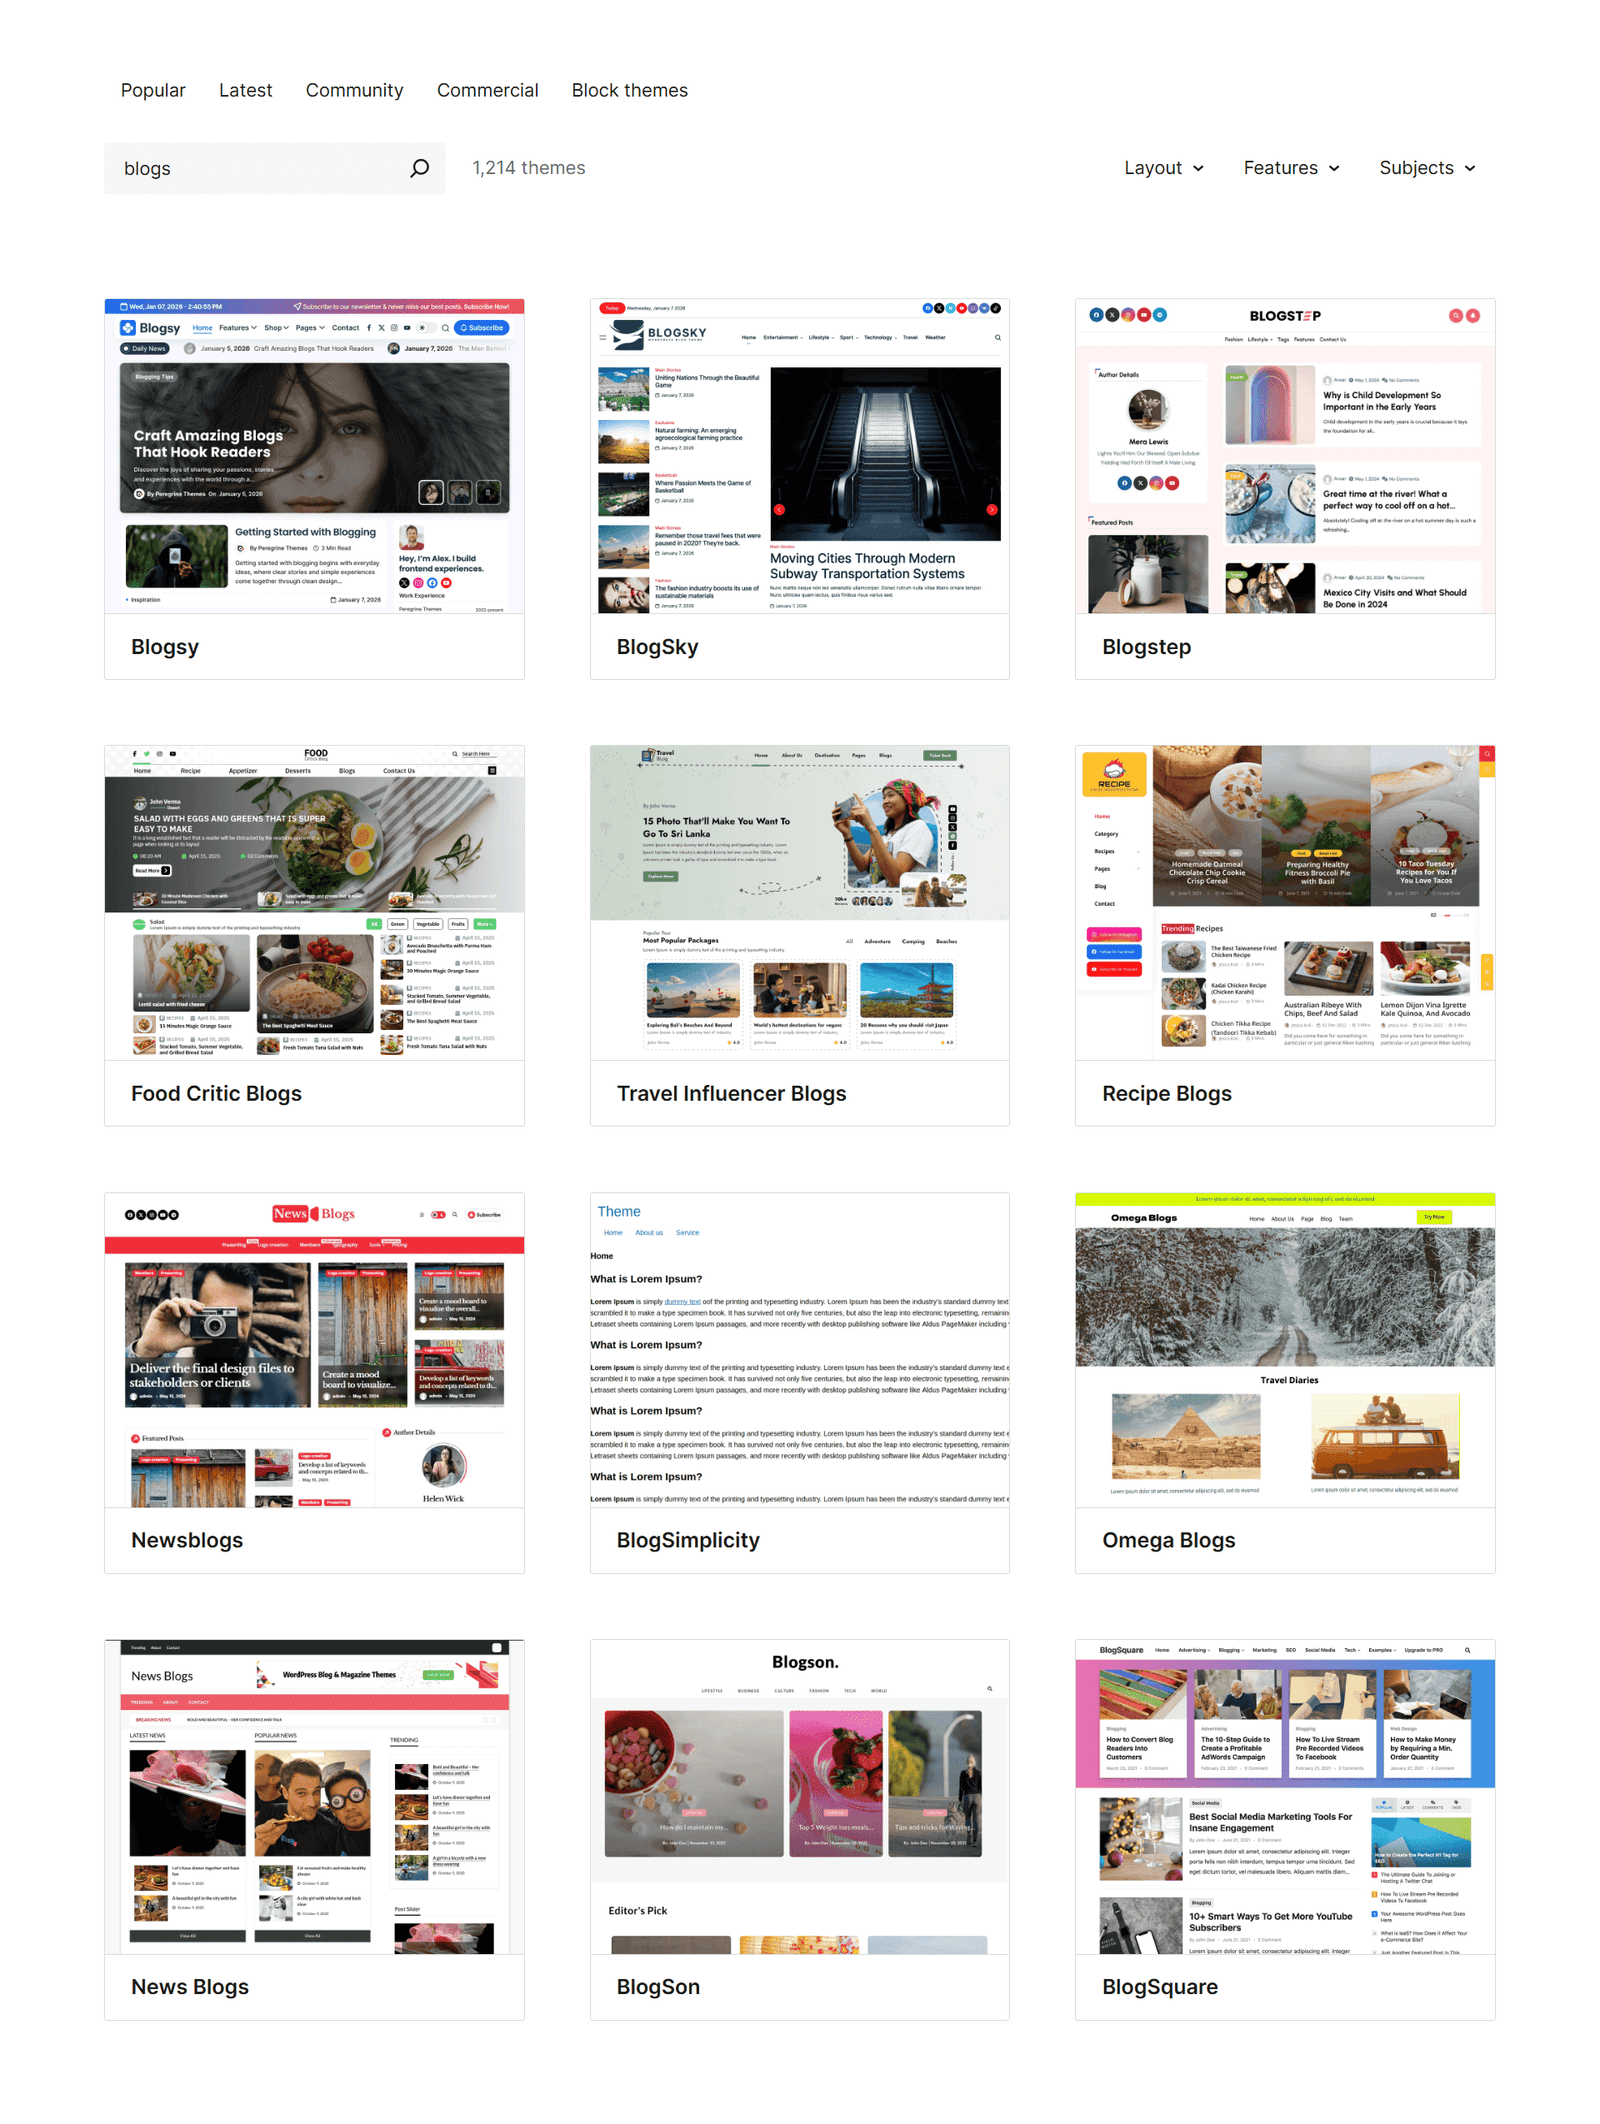
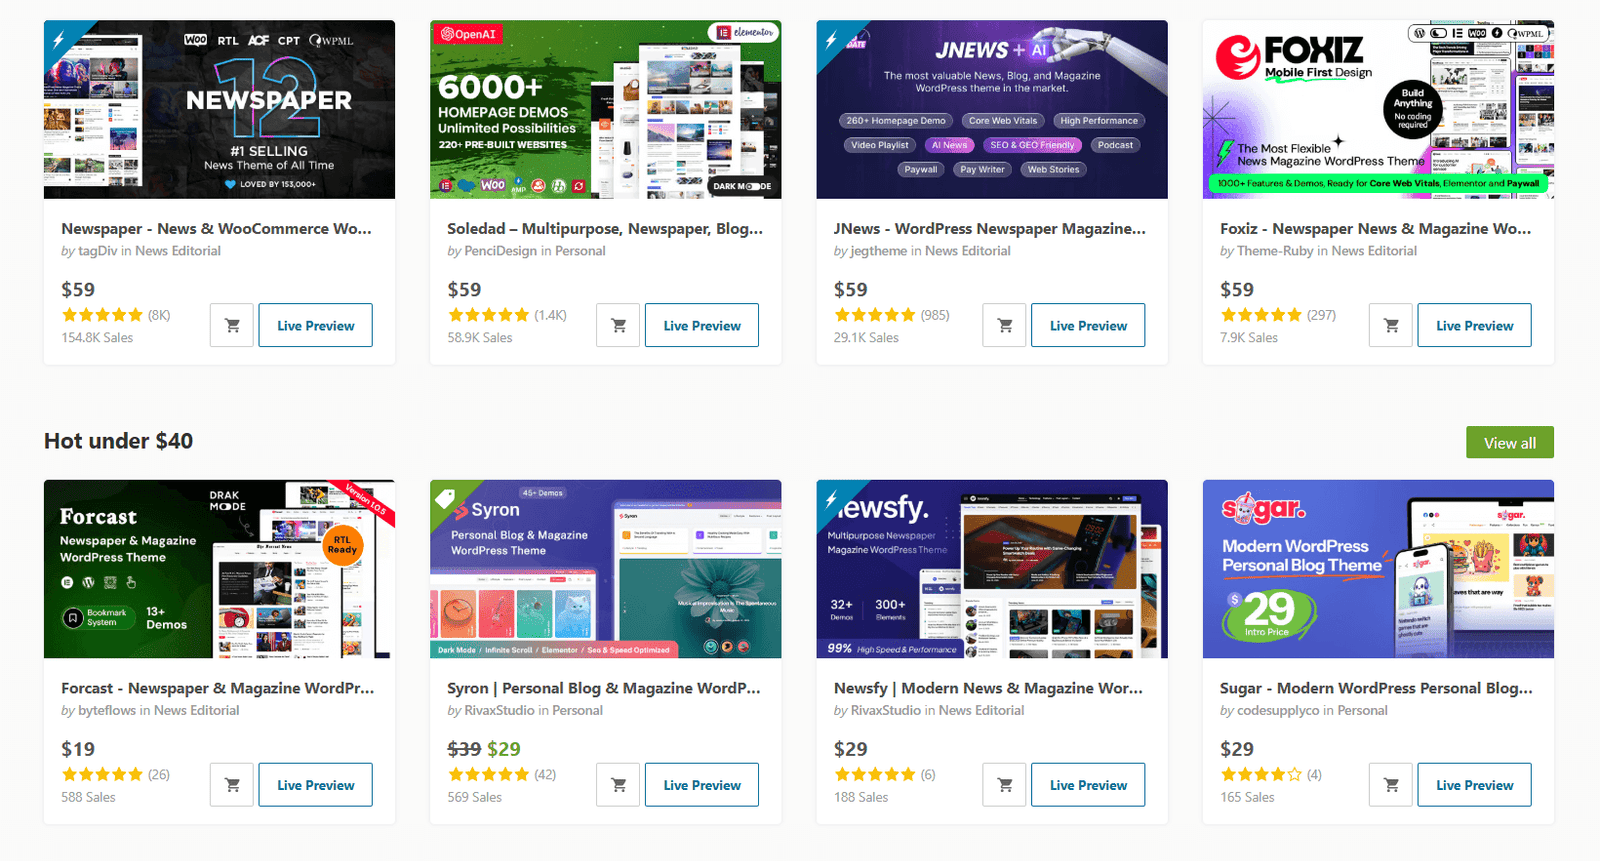
Premium Themes: If you want a slicker design without touching any code, paid themes from marketplaces like ThemeForest give you advanced features and dedicated customer support.
- Preview before activating: Always check how the theme looks on your phone before you commit. Most people will read your blog on mobile anyway!
Customize Your Theme
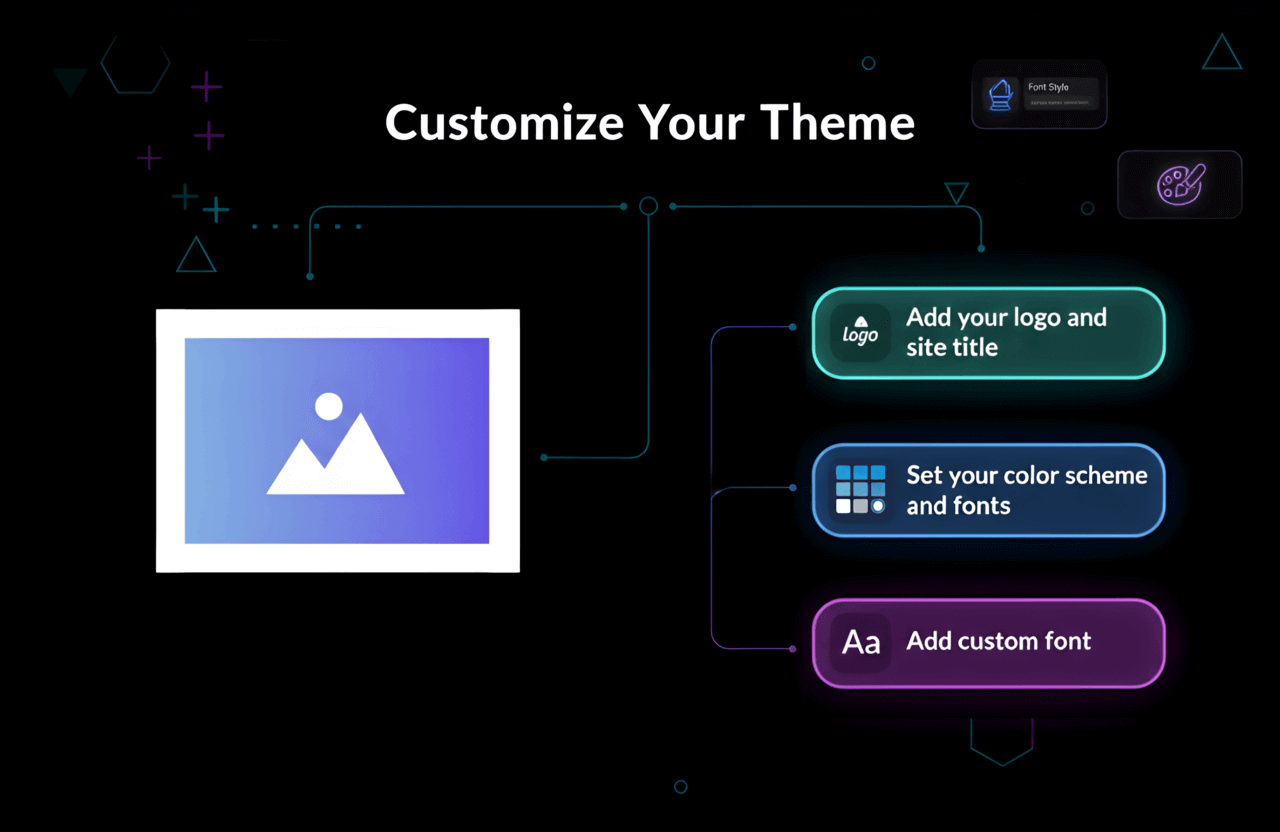
- Add your logo and site title: Don't have a logo? Just use Canva or a free online generator to whip one up.
- Set your color scheme and fonts: Pick a couple of colors and stick to them. Consistency is how you build a recognizable brand.
- Add custom font: Want to stand out? Connect a custom web font to give your site a distinct vibe that matches your personality.
Resource: Need help tweaking your typography? Read our quick guide on How To Add A WordPress Custom Font?
Essential Plugins for Beginners
Plugins are basically apps for your website. They add cool new features. Here are the absolute must-haves for a fresh blog:
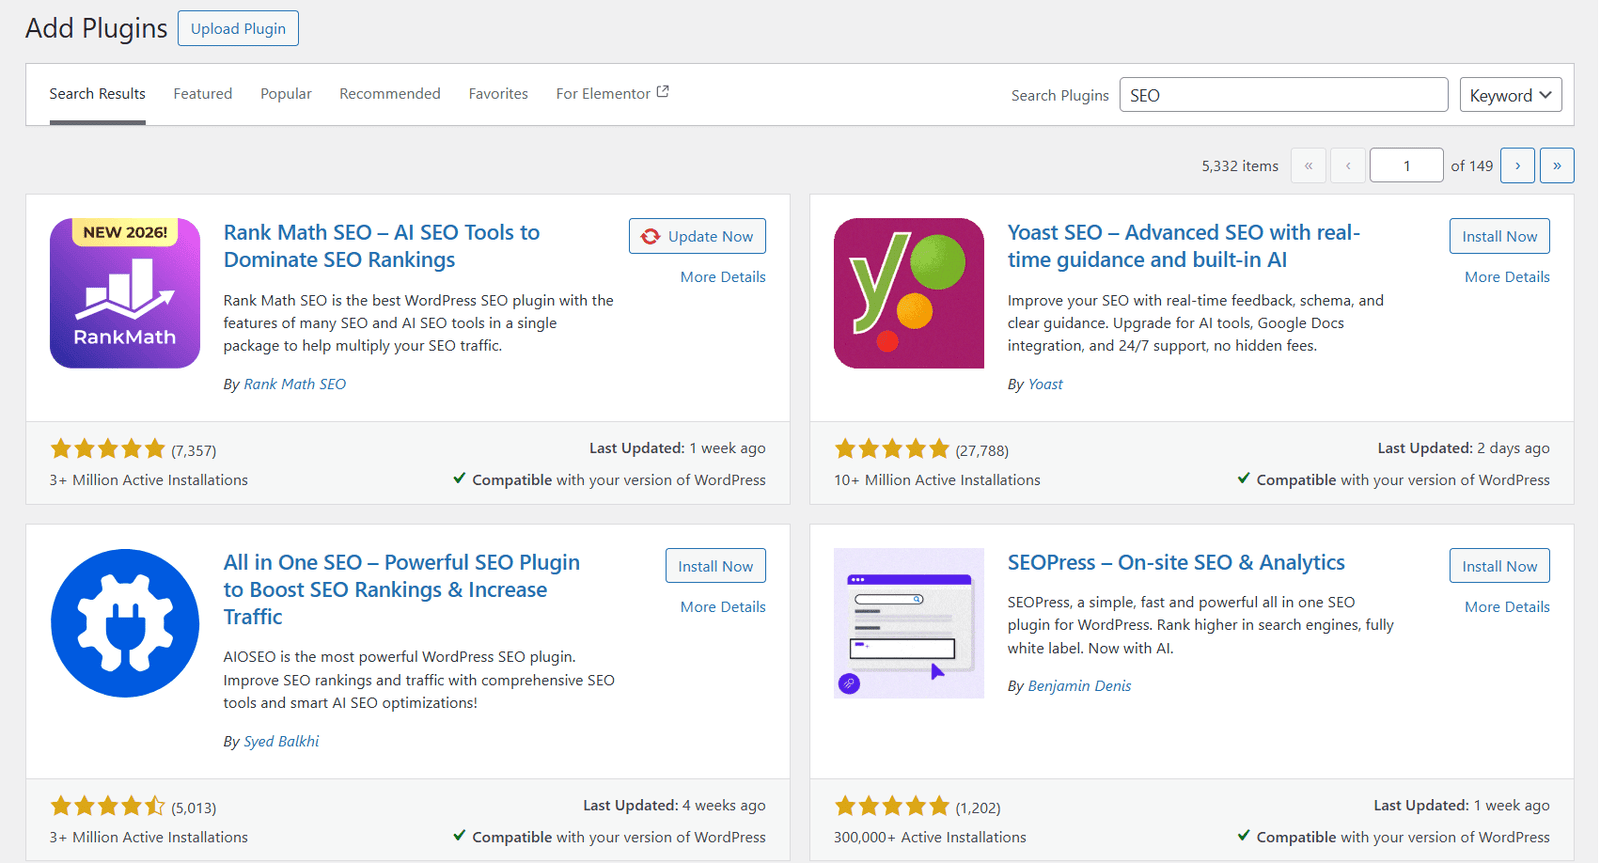
Yoast SEO or RankMath: Non-negotiable if you ever want to show up on Google.
WP Rocket or W3 Total Cache: Keeps your site running lightning fast.
UpdraftPlus: Automatically backs up your blog. Trust me, you'll be glad you have this when you accidentally break something.
Akismet: Blocks those annoying spam comments.
MonsterInsights: Hooks your site up to Google Analytics so you can actually see who is reading your posts.
You can hunt down all of these in the WordPress plugin hub.
Step 6: Create Core Pages and Your First Post
Before you publish your first article, get the housekeeping out of the way. Set up these core pages:
- About: Tell people who you are and why they should care about your blog.
- Contact: Give readers (and future sponsors!) an easy way to email you.
- Privacy Policy: This is legally required if you track analytics or plan to run ads.
- Disclaimer (if needed): A must-have if you're using affiliate links or giving professional advice (like financial or health tips).
Write and Publish Your First Blog Post
Your content is your actual product. If you want to win, you have to write stuff that's way better than whatever is currently sitting on page one of Google.
The "Pillar Content" Strategy
Stop treating your blog like a personal diary. Instead, build massive, helpful resources.
The "How-To" Guide: Deep-dive tutorials (kind of like the one you're reading right now).
The Listicle: Think "Top 10 Tools for..." or "7 Ways to..."
The Case Study: People love proof. "How I did X in Y days" always gets clicks.
Note on AI Writing: Look, tools like ChatGPT are amazing for brainstorming and outlining. But please don't just copy and paste an AI draft. Google actively looks for real human experience and unique perspectives (they call it E-E-A-T). Add your own flavor.
Structure of a Perfect Blog Post
Catchy Headline: Make a bold promise to the reader.
The Hook: Your first sentence has to grab them by the collar so they don't click away.
Subheadings (H2, H3): Nobody wants to read a giant wall of text. Break it up.
- Optimize for SEO: Naturally weave your target keywords into the title, headings, and paragraphs. Check out our SEO for New Website Checklist if you're confused.
Media: Drop in a photo, video, or chart every few paragraphs to keep things visually interesting.
Internal Links: Link out to your other articles. It keeps people on your site way longer.
- Add a call to action: Tell them what to do next! Ask them to leave a comment or join your email list.
Pro tip: Forget about being perfect. Your writing is going to get so much better the more you do it. The only way to win is to actually hit the publish button.
Step 7: Promote Your Blog and Grow Your Audience
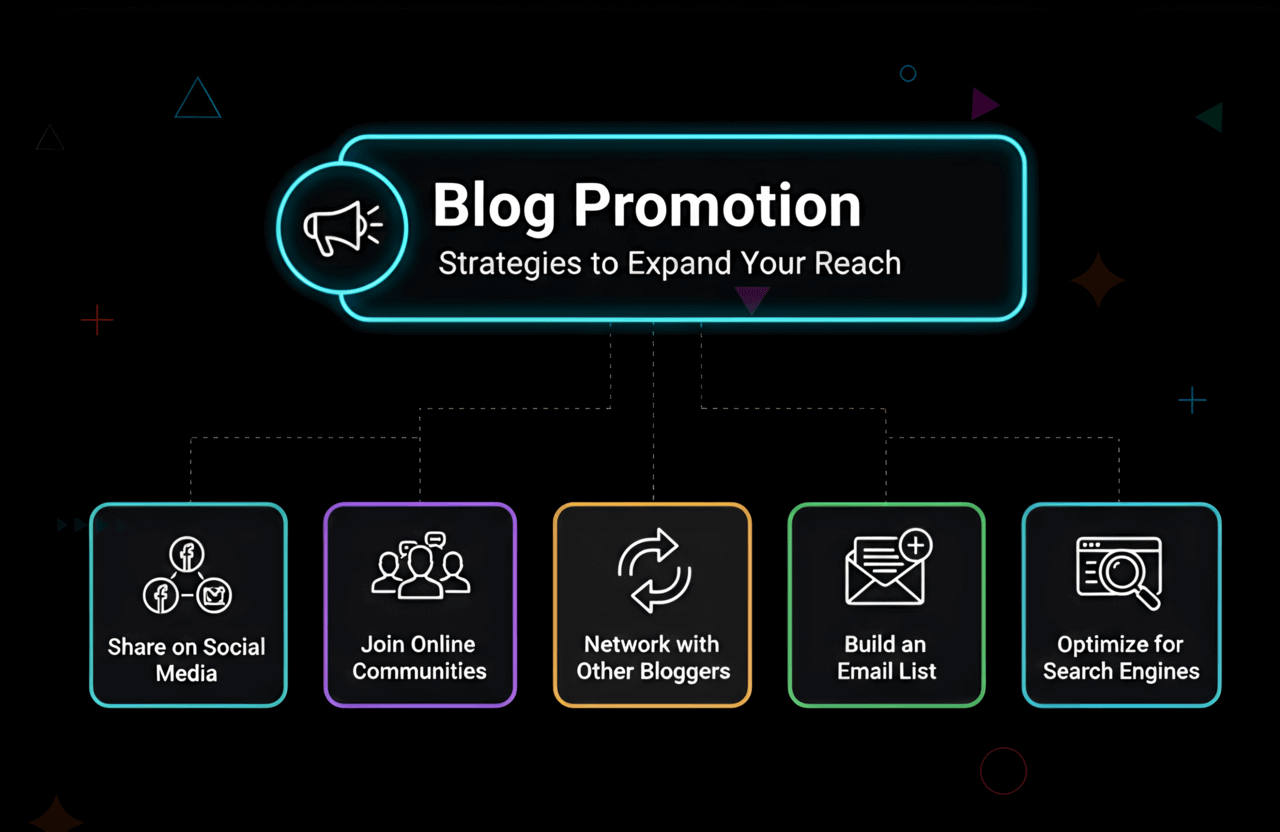
Hitting publish isn't the finish line—it's the starting line. Now you have to actually get eyeballs on your work:
- Share on social media: Set up profiles on the apps where your target readers actually spend their time (Twitter, Instagram, LinkedIn, Pinterest, etc.).
- Join online communities: Get active in Reddit threads, Facebook groups, or niche forums. Don't just spam your links; actually help people.
- Network with other bloggers: Leave thoughtful comments on their sites, pitch guest posts, and make friends in your industry.
- Build an email list: Give away a free PDF guide or checklist in exchange for email addresses.
- Optimize for search engines: Nail your on-page SEO and start hunting for backlinks to push your site up the Google ranks.
Social Media
Don't exhaust yourself trying to be everywhere at once. Pick one app and master it.
Visual Niche (Food/Travel): Go hard on Pinterest and Instagram.
Professional/Tech: LinkedIn and X (Twitter) are your best friends.
Gen Z Target: You absolutely need to be on TikTok.
SEO (Organic Traffic)
This is how you play the long game. By tweaking your posts for specific keywords, Google will eventually send you traffic while you sleep. Yes, it might take 6 to 12 months to really kick in, but once it does, it's consistent and totally free.
- Keyword research: Use the tools we talked about to figure out exactly what your audience is Googling.
- On-page SEO: Clean up your titles, subheadings, meta descriptions, and custom URLs.
- Internal linking: Connect your posts together like a web.
- Backlinks: Convince other trusted websites to link back to your blog.
- Mobile-friendly design: Double-check that your site isn't broken on smartphones.
Want to nerd out on this? Dive into our guide on SEO Onpage VS Offpage Optimization.
Email Marketing
Listen to me: this is the most valuable asset your blog will ever have. Social media algorithms can change overnight and tank your reach, but nobody can take your email list away. Start grabbing emails on day one using platforms like ConvertKit or MailerLite. Give people a reason to sign up (like a free cheat sheet).
Email Marketing Tip: If you're looking to send out large newsletters efficiently, give GetResponse a try.
Want to monetize? Once you've got a steady stream of readers, it's time to look into AdSense approval, affiliate links, or selling your own digital stuff.
Step 8: Blogging for Income: Monetization Strategies
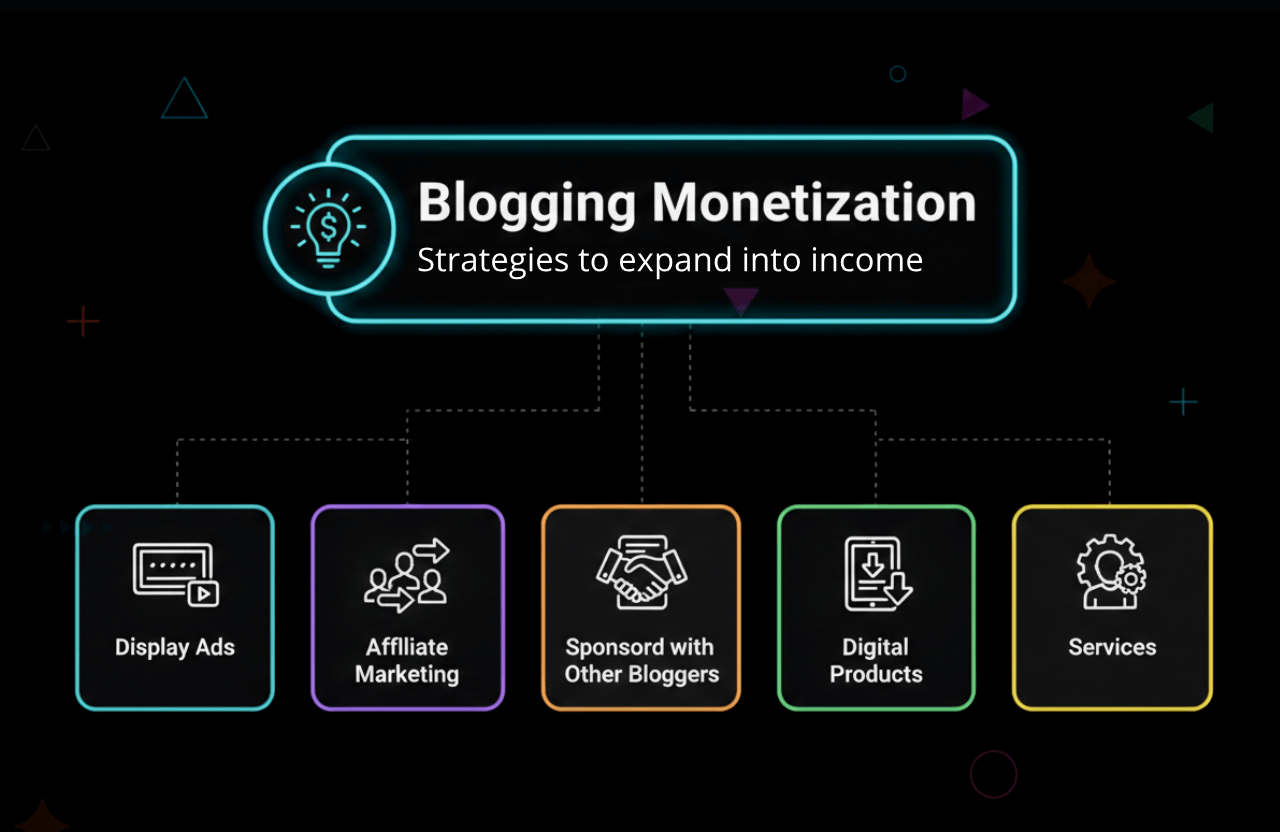
Yes, you can absolutely make a part-time (or even full-time) living from a blog. Here is how the pros do it:
- Display ads: Sign up for networks like Google AdSense and get paid simply when people view or click ads on your site.
- Affiliate marketing: Recommend a product you love, drop a special tracking link, and earn a cut if someone buys it.
- Sponsored posts: Brands will literally pay you cash to write an article reviewing their stuff.
- Digital products: Package your knowledge into an ebook, a video course, or downloadable printables.
- Services: Leverage your blog to book freelance clients, consulting gigs, or coaching calls.
Curious about the math? Read our breakdown on How to earn $100 per day.
Blogging Best Practices for Beginners
- Be consistent: Decide on a schedule (like every Tuesday) and don't miss it. Readers love reliability.
- Focus on quality: I'd rather read one incredibly helpful, deeply researched post than four rushed, shallow updates.
- Engage with your audience: Reply to every single comment and email. That's how you turn casual readers into super fans.
- Track your progress: Hook up Google Analytics and actually look at the data. Find out what's working and do more of it.
- Keep learning: The internet moves fast. Keep reading up on the latest SEO tricks and blogging trends.
Further reading: Want a quick SEO boost? Check out the difference between Article and BlogPosting Schema Markup.
How Much Does It Cost to Start a Blog?
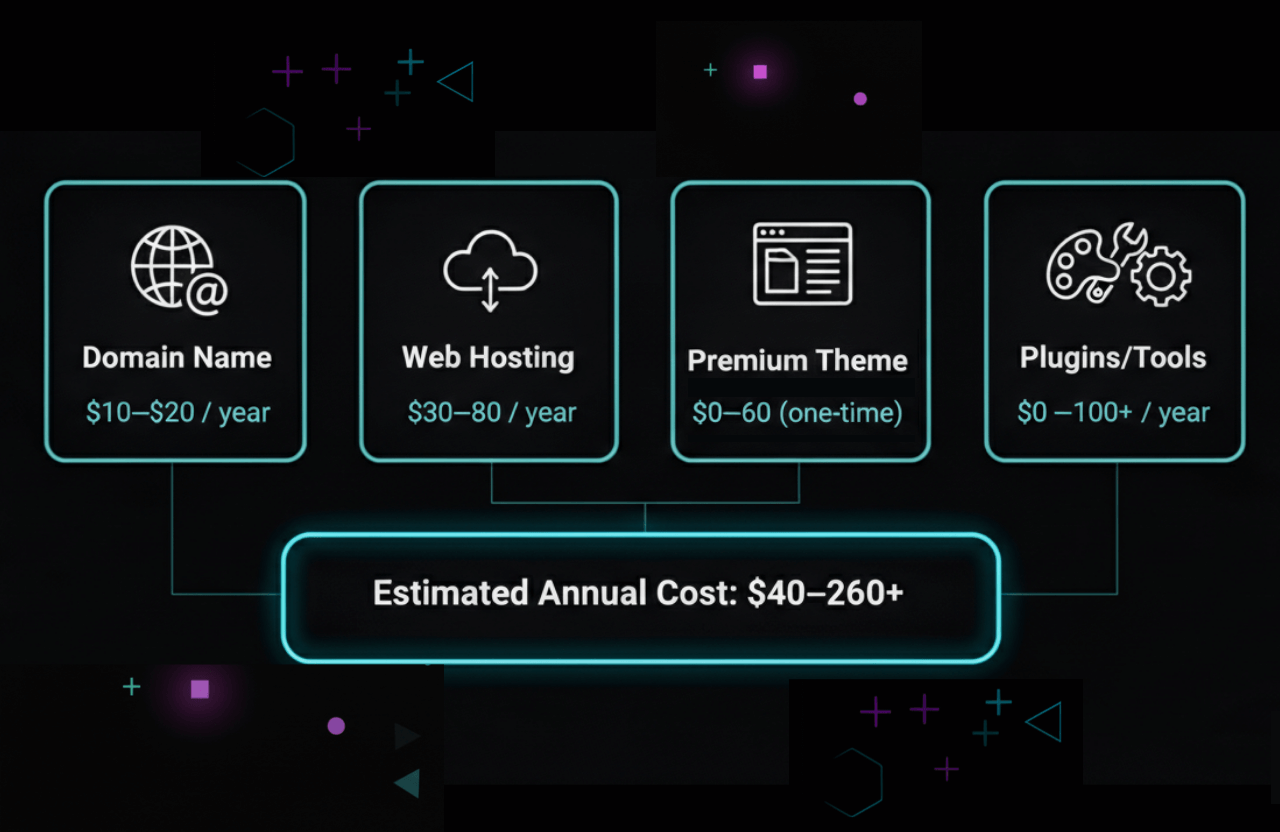
Starting a blog is hands-down one of the cheapest businesses you can launch. Here’s a typical breakdown:
| Item | Estimated Cost (Yearly) |
|---|---|
| Domain Name | $10–$20 |
| Web Hosting | $30–$80 |
| Premium Theme (optional) | $0–$60 |
| Plugins/Tools (optional) | $0–$100+ |
You can easily get off the ground for less than $100 a year. As your traffic blows up, sure, you might buy fancier tools, but starting out is incredibly budget-friendly.
Common Blogging Mistakes to Avoid
Even the smartest people mess up when they're figuring out how to start a blog. Steer clear of these traps:
Inconsistency: Posting like crazy for a week and then ghosting your readers for two months is a massive growth killer. Pace yourself.
Ignoring User Experience (UX): If your site takes ten seconds to load or bombs people with annoying pop-ups, they will leave immediately.
- Ignoring SEO: If you don't optimize, Google won't know you exist. It's that simple.
Cluttered Sidebar: Giant, messy sidebars are a thing of the past. Clean it up so people focus on your actual writing.
Giving Up Too Soon: This is a marathon. So many bloggers throw in the towel right before the algorithm was about to bless them with traffic. Stick with it.
Case study: A ton of successful bloggers say they only made about $100 to $500 in their entire first year. But once that content library grows? The income scales up fast.
Tools and Resources for Beginner Bloggers
- WordPress: The absolute king of blogging platforms.
- Google Analytics: Your command center for tracking traffic.
- Canva: A lifesaver for making cool graphics when you don't know Photoshop.
- Grammarly: Acts like a second pair of eyes to catch embarrassing typos.
- SEMrush: The ultimate tool for finding keywords. Grab a SEMrush Free Trial to test it out.
- Plagiarism Checker: Always make sure your stuff is 100% original. Bookmark our list of Plagiarism Checker Free Online Tools.
FAQ: Getting Started with Blogging
Do I need to know coding to start a blog?
Nope, not at all! Modern platforms like WordPress use drag-and-drop builders. If you can use Microsoft Word, you can build a blog.
Can I start a blog for free?
Technically, yes. Sites like Medium or WordPress.com let you post for free. But you'll have a clunky domain name (like yourblog.wordpress.com), you won't have control over the design, and making money through ads is usually blocked. If you treat this like a business, you need self-hosting.
How often should I publish new posts?
Consistency is way more important than sheer volume. Google prefers deep, valuable content. It's much better to post one fantastic article a week than three mediocre ones.
How long does it take to make money blogging?
It's completely different for everyone. Some folks make a few bucks by month three, while others grind for a year before seeing a dime. It all comes down to your niche, how good your writing is, and how hard you promote your site.
Your Blogging Blueprint: Start Today
Figuring out how to start a blog is an amazing journey. Without even realizing it, you're going to become a sharper writer, a clever digital marketer, and a tech-savvy entrepreneur. But the absolute most important step is just taking action. Pick that niche, buy the hosting, and put your first post out there. You can tweak and fix things as you go.
The best time to start a blog was five years ago. The second best time is literally right now. Don't let overthinking paralyze you. Grab your domain, draft up a messy first post, and hit publish. There is an audience out there waiting to read it.
Want to dive even deeper? Check out our other resources on SEO for new websites, building killer backlinks, and exactly how to monetize your blog.
Happy blogging!